
Audience: Teachers
The Groups feature in ActiveInstruct™ allows teachers to organize students into groups during a live class session. Groups can be used to apply different SiteBanks, send messages to specific students, and apply lockdown controls to individual groups instead of the entire class.
Create a Group Arrangement
To create a new group arrangement:
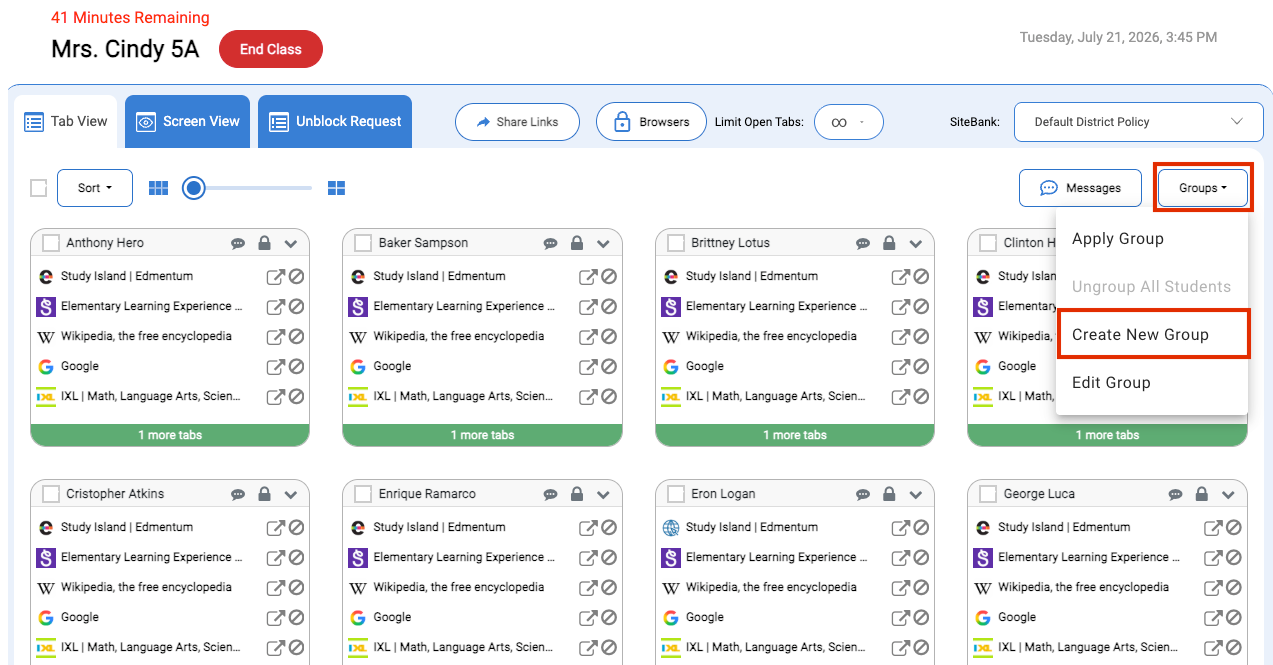
- During a live classroom session, click Groups in the upper-right corner.
- Select Create New Group.
- Choose whether you want to create groups Randomly or Manually.
Create Random Groups
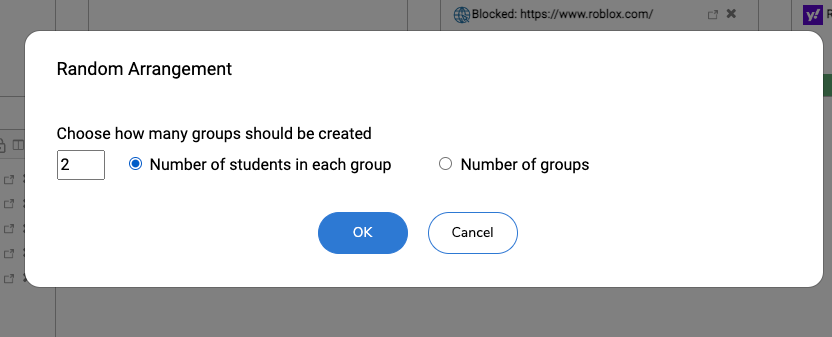
When creating random groups, you can choose one of two methods:
By Number of Students per Group
Enter the number of students you would like in each group, and ActiveInstruct will automatically create the groups.
By Number of Groups
Enter the total number of groups you want to create, and ActiveInstruct will distribute students evenly among them.
Create Groups Manually
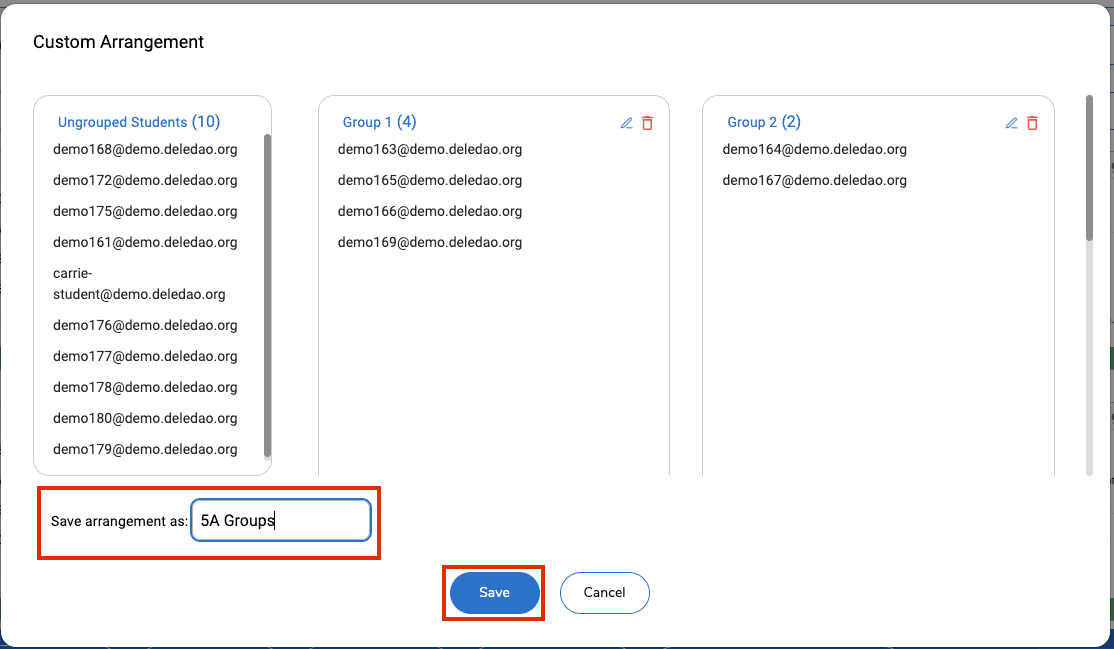
To manually organize students:
- Select a student from the list.
- Drag and drop the student into the desired group.
- Repeat until all students are assigned.
After arranging your groups:
- Enter a name for the group arrangement.
- Click Save.
Apply a Group Arrangement
Once a group arrangement has been saved, it can be applied to an active classroom.
To apply a saved arrangement:
- Click Apply Group.
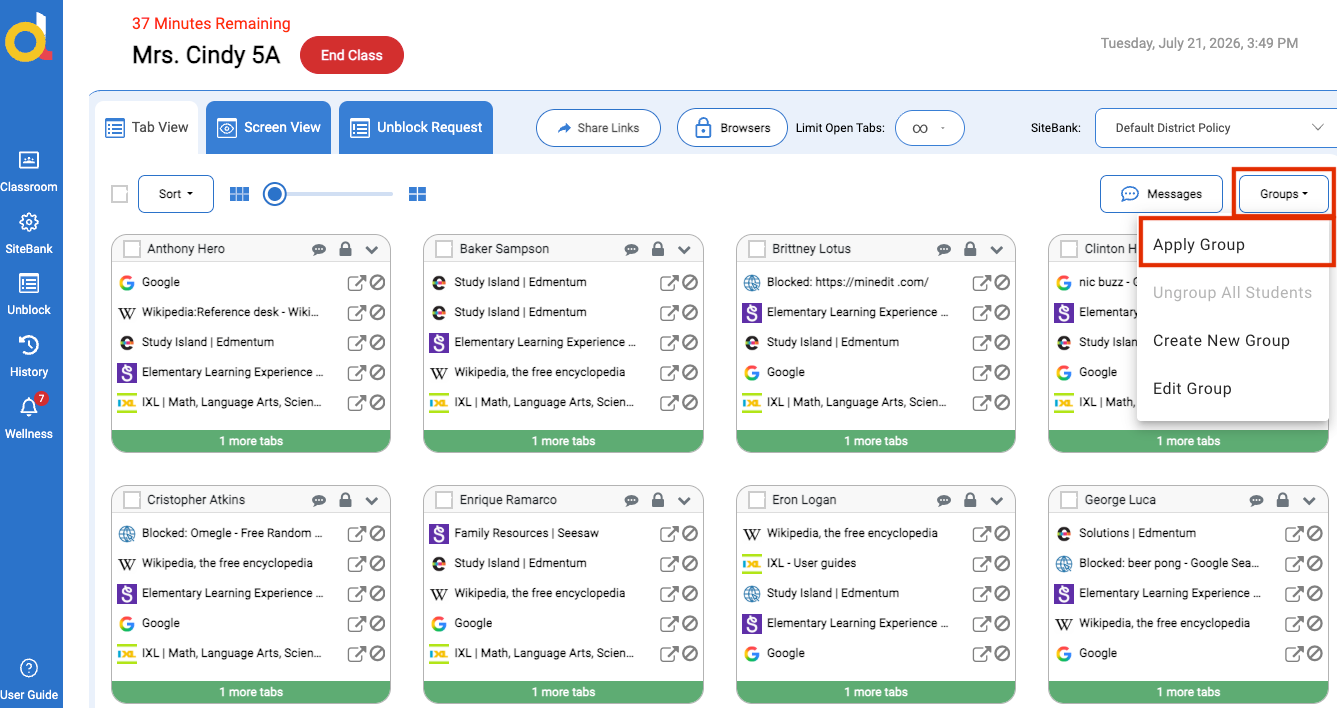
- Select the group arrangement you would like to use.
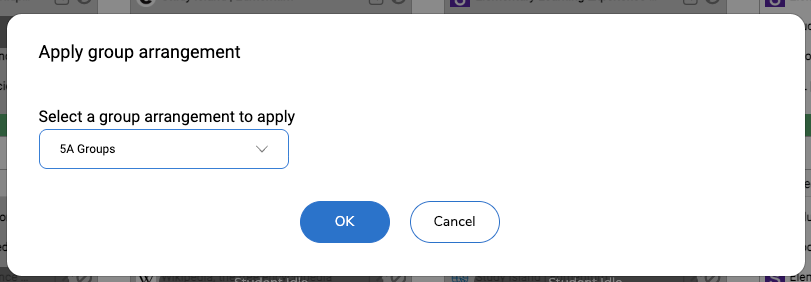
- Click OK.
The selected groups will immediately be available within the live classroom.
Manage Groups During Class
After groups have been applied, teachers can manage each group independently.
Available actions include:
- Applying different SiteBanks to individual groups
- Sending messages to a specific group
- Applying lockdown controls to selected groups
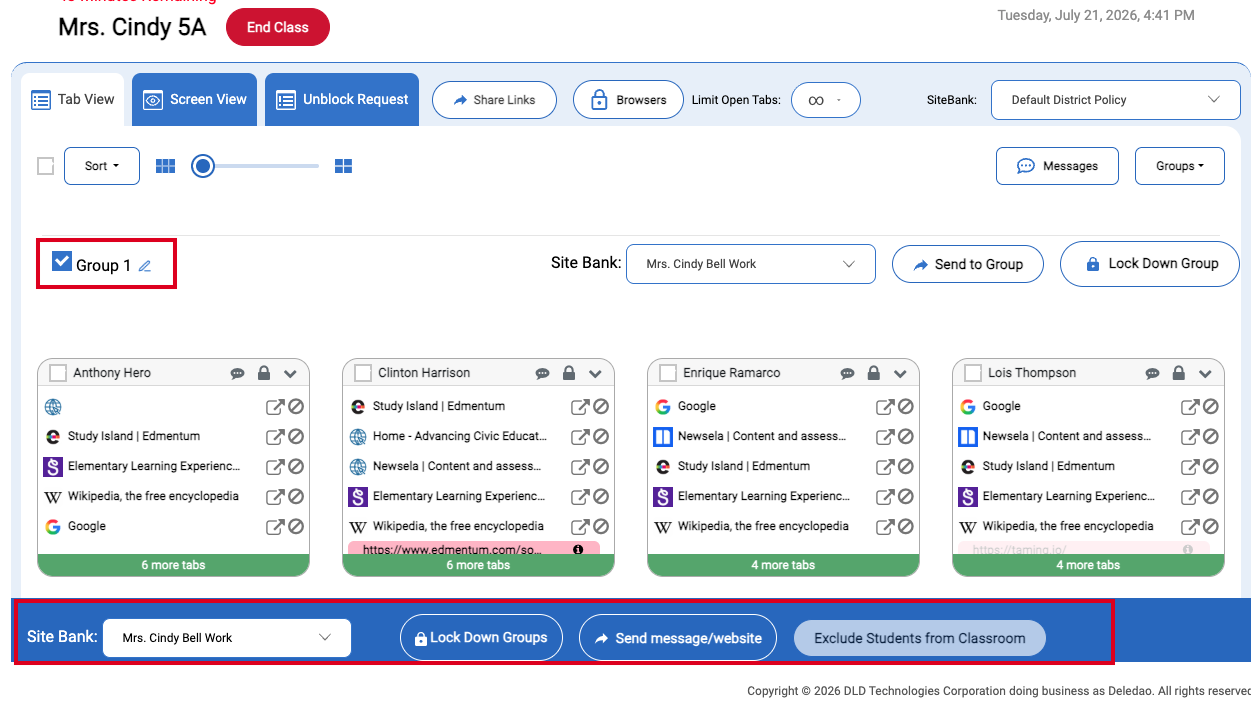
To perform actions on a group, select the checkbox next to the group and choose the desired option from the bottom of the page.
Edit or Delete a Group Arrangement
To modify an existing group arrangement:
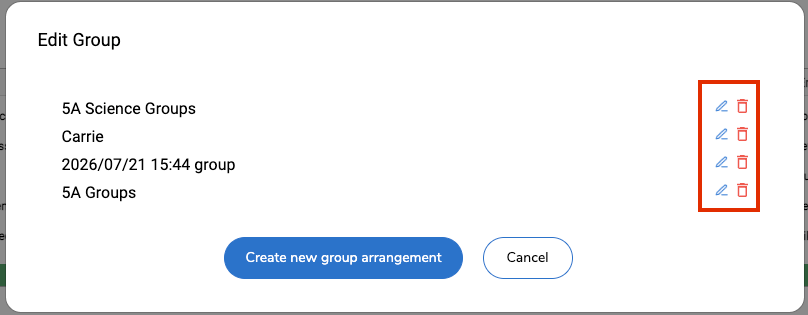
- Click Edit Group.
- Locate the arrangement you want to manage.
Available options include:
- Pencil icon – Edit the group arrangement.
- Trash can icon – Delete the group arrangement.
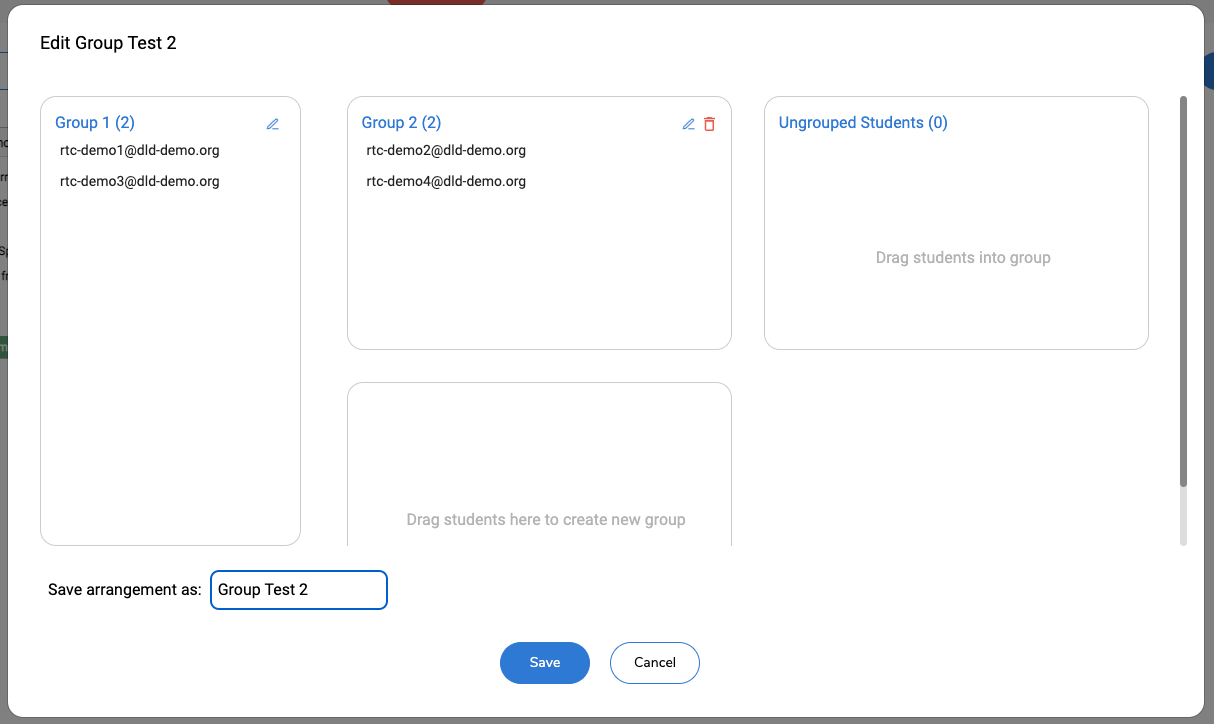
When editing:
- Make the desired changes.
- Click Save to update the arrangement.
Quickly Apply SiteBanks to Individual Students
If you need to apply a different SiteBank to one or more students without creating a formal group arrangement:
- Select the student(s).
- Choose the SiteBank you want to apply.
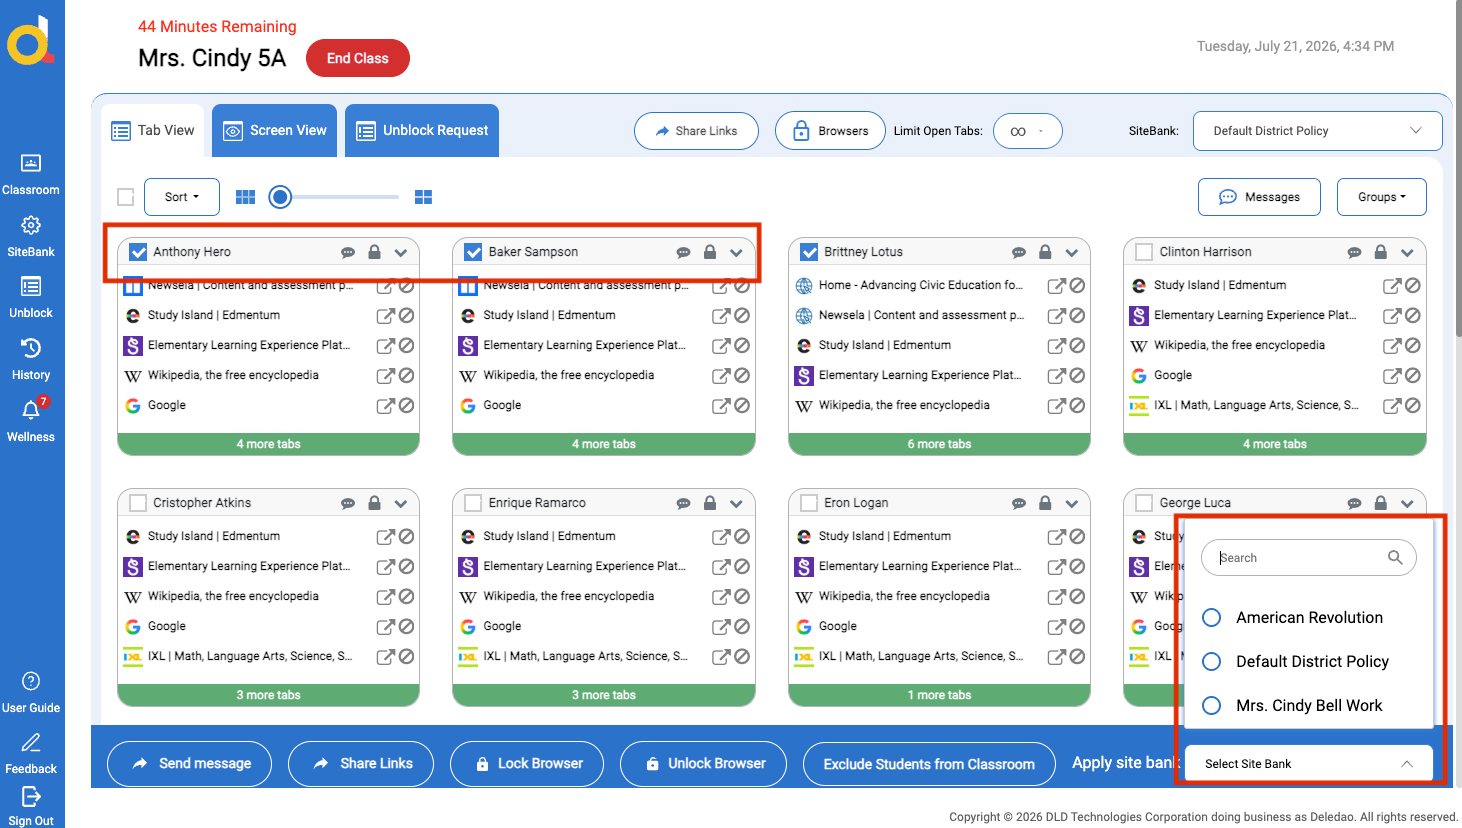
- ActiveInstruct automatically creates temporary small groups based on your selection.
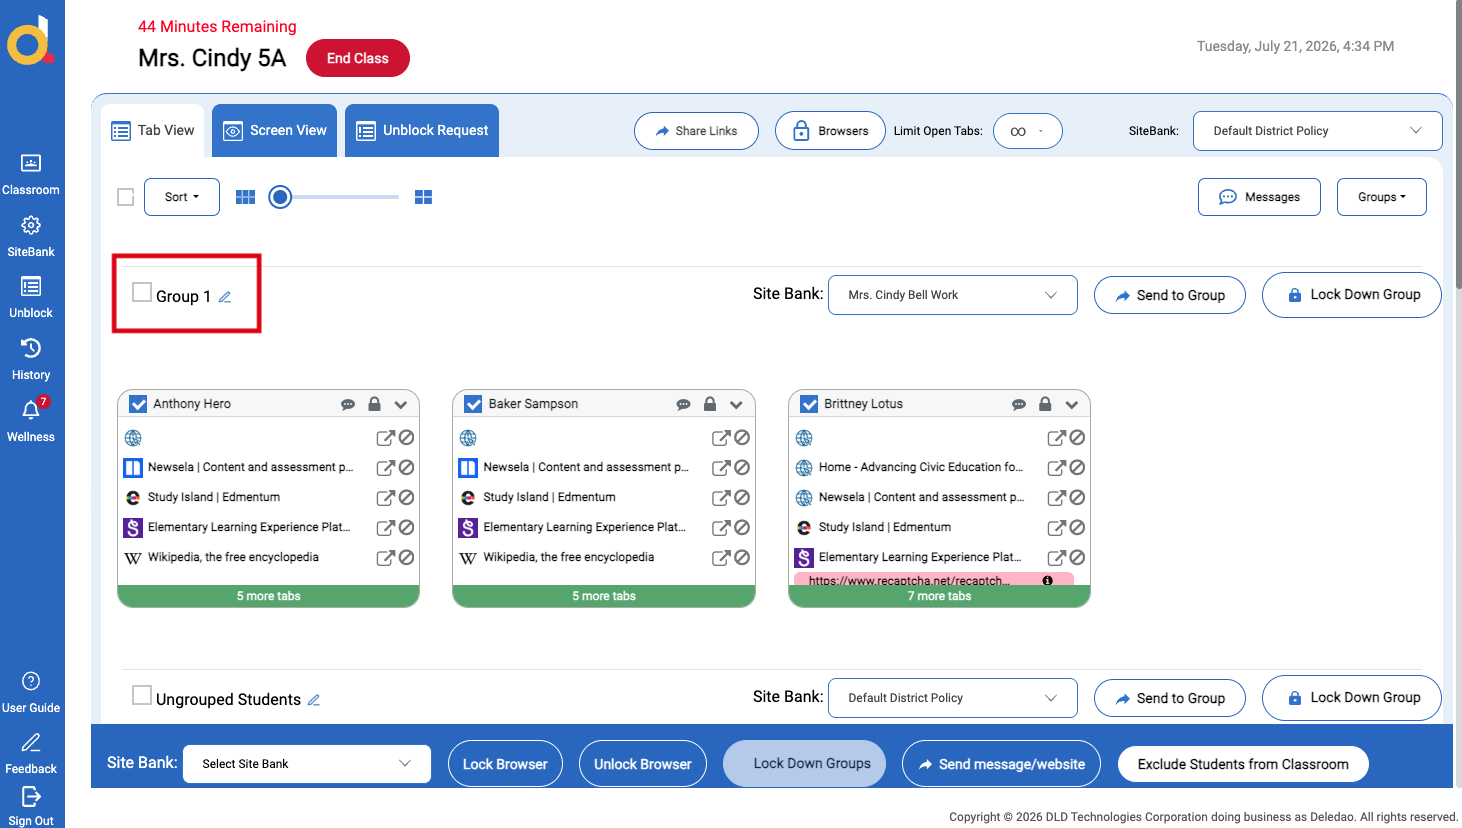
Remove Temporary Groups
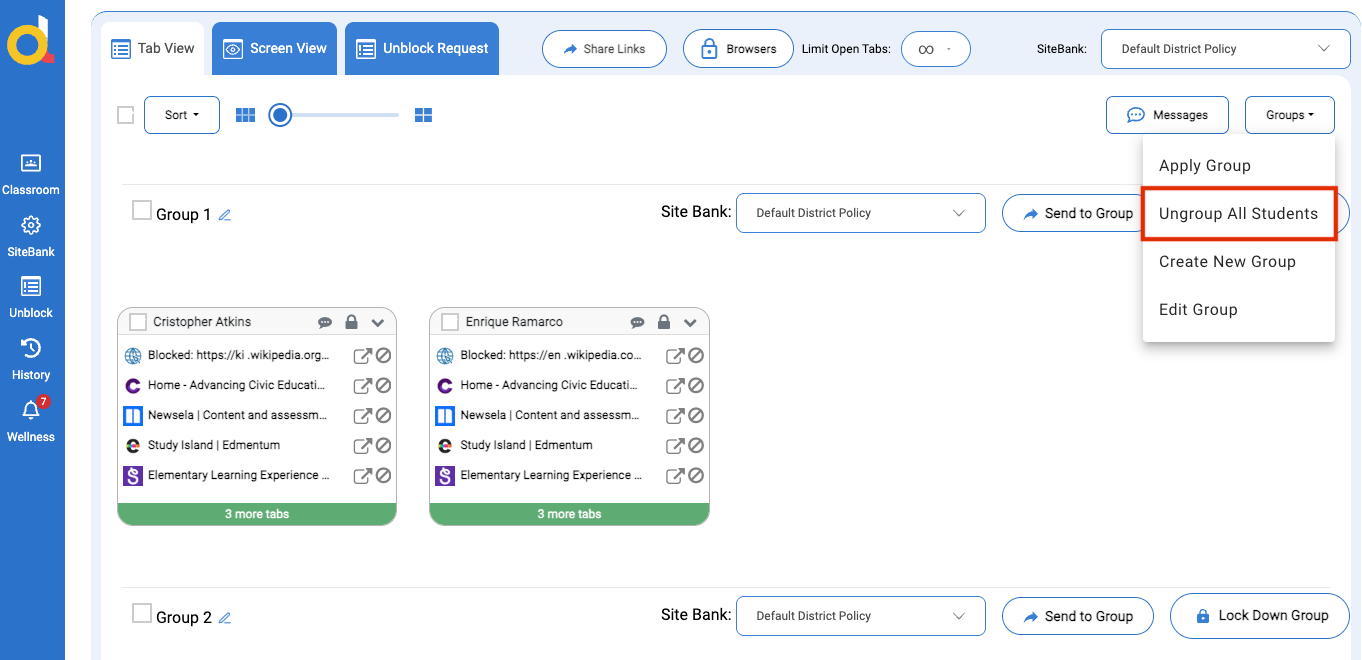
To return all students to the main classroom group:
- Open Groups.
- Select Ungroup All Students.
This removes the temporary groups and restores the standard classroom configuration.
Best Practices
- Create and save group arrangements before class to reduce setup time.
- Use groups to support differentiated instruction and small-group activities.
- Apply different SiteBanks when groups require access to different learning resources.
- Use group messaging to communicate instructions without disrupting the entire class.
- Remove temporary groups when group-based controls are no longer needed.
Small Groups provide teachers with additional flexibility for managing instruction, collaboration, and web access during live classroom sessions.
© Deledao Education