
Table of Contents
Audience: Administrators
The Policy Manager is the central location for configuring content filtering within Deledao. Policies determine which websites, categories, keywords, and content types users can access while allowing districts to customize filtering based on grade level, organizational unit (OU), instructional needs, and local requirements.
This article explains Rule hierarcy, management, and best practices. See related article Policy Manager: Configuring Rules for additional information.
Understanding Policies
Policies control how web traffic is filtered for your users.
Administrators can create policies that:
- Allow or block websites
- Filter by category
- Apply content safety controls
- Manage YouTube access
- Blur or block inappropriate imagery
- Restrict downloads and streaming media
- Apply different settings to different groups of users
Policies can be assigned based on Organizational Units (OUs), allowing different filtering settings for students, staff, and other user groups.
Rule Hierarchy
Policy rules are evaluated from top to bottom. Understanding rule order is important because the first rule whose conditions match the user will be applied.
Think of the rule list as a funnel:
- A user accesses a website.
- Deledao evaluates the rule at the top of the list.
- If that rule's conditions match, Deledao applies that rule and stops evaluating additional rules.
- If the conditions do not match, Deledao moves to the next rule.
- This process continues until a matching rule is found.
- If no rule matches, the Default Rule is applied.
The Default Rule
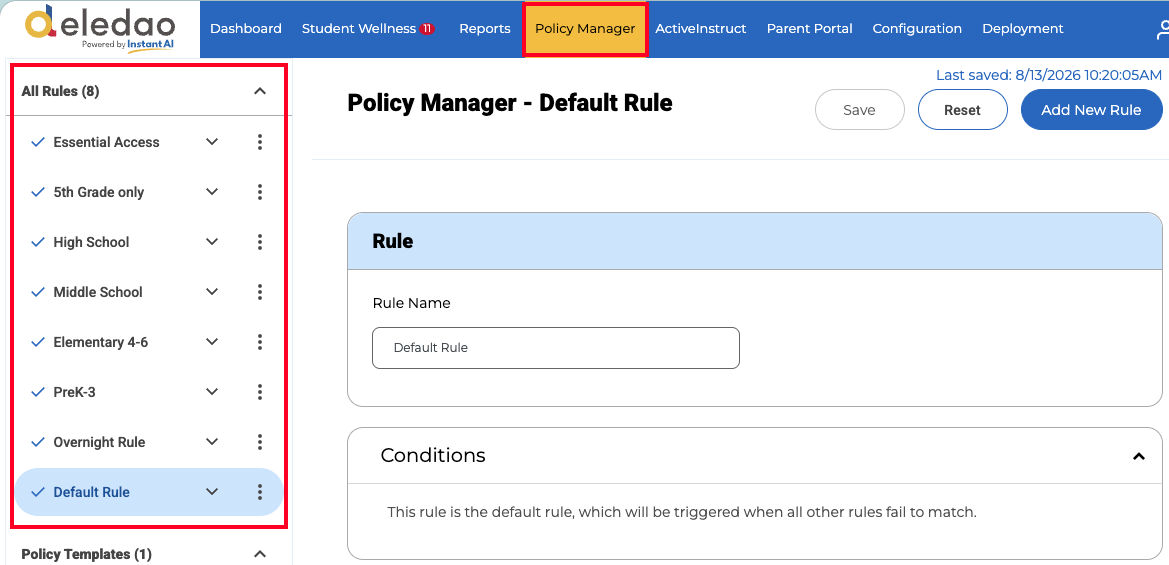
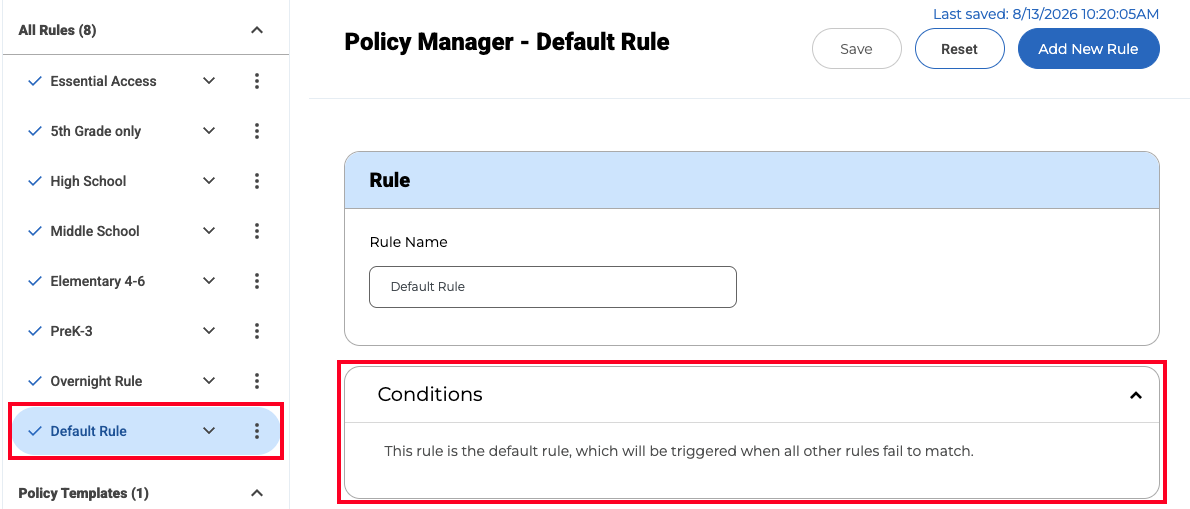
Every policy contains a Default Rule.
The Default Rule serves as a fail-safe and is applied whenever no other rule conditions match the user.
Important Notes
- The Default Rule cannot be moved.
- The Default Rule is always evaluated last.
- Every user will ultimately receive a rule assignment, even if no other conditions are met.
Rule Order Matters
Because rules are processed from top to bottom, more specific rules should generally be placed above broader rules.
Example
Suppose you have:
- Rule A
- User: john.doe@school.org
- Rule B
- Organizational Unit: /Class of 2040
If John Doe is a member of the /Class of 2040 OU, both rules technically match. To ensure John receives the settings from the individual user rule, place Rule A above Rule B. In this example, the John Doe rule is evaluated first and applied before the /Class of 2040 rule is considered.
Best Practice: Place the most restrictive rules at the top and least restrictive rules lower in the list.
Reordering Rules
Administrators can change the order of rules by using drag-and-drop.
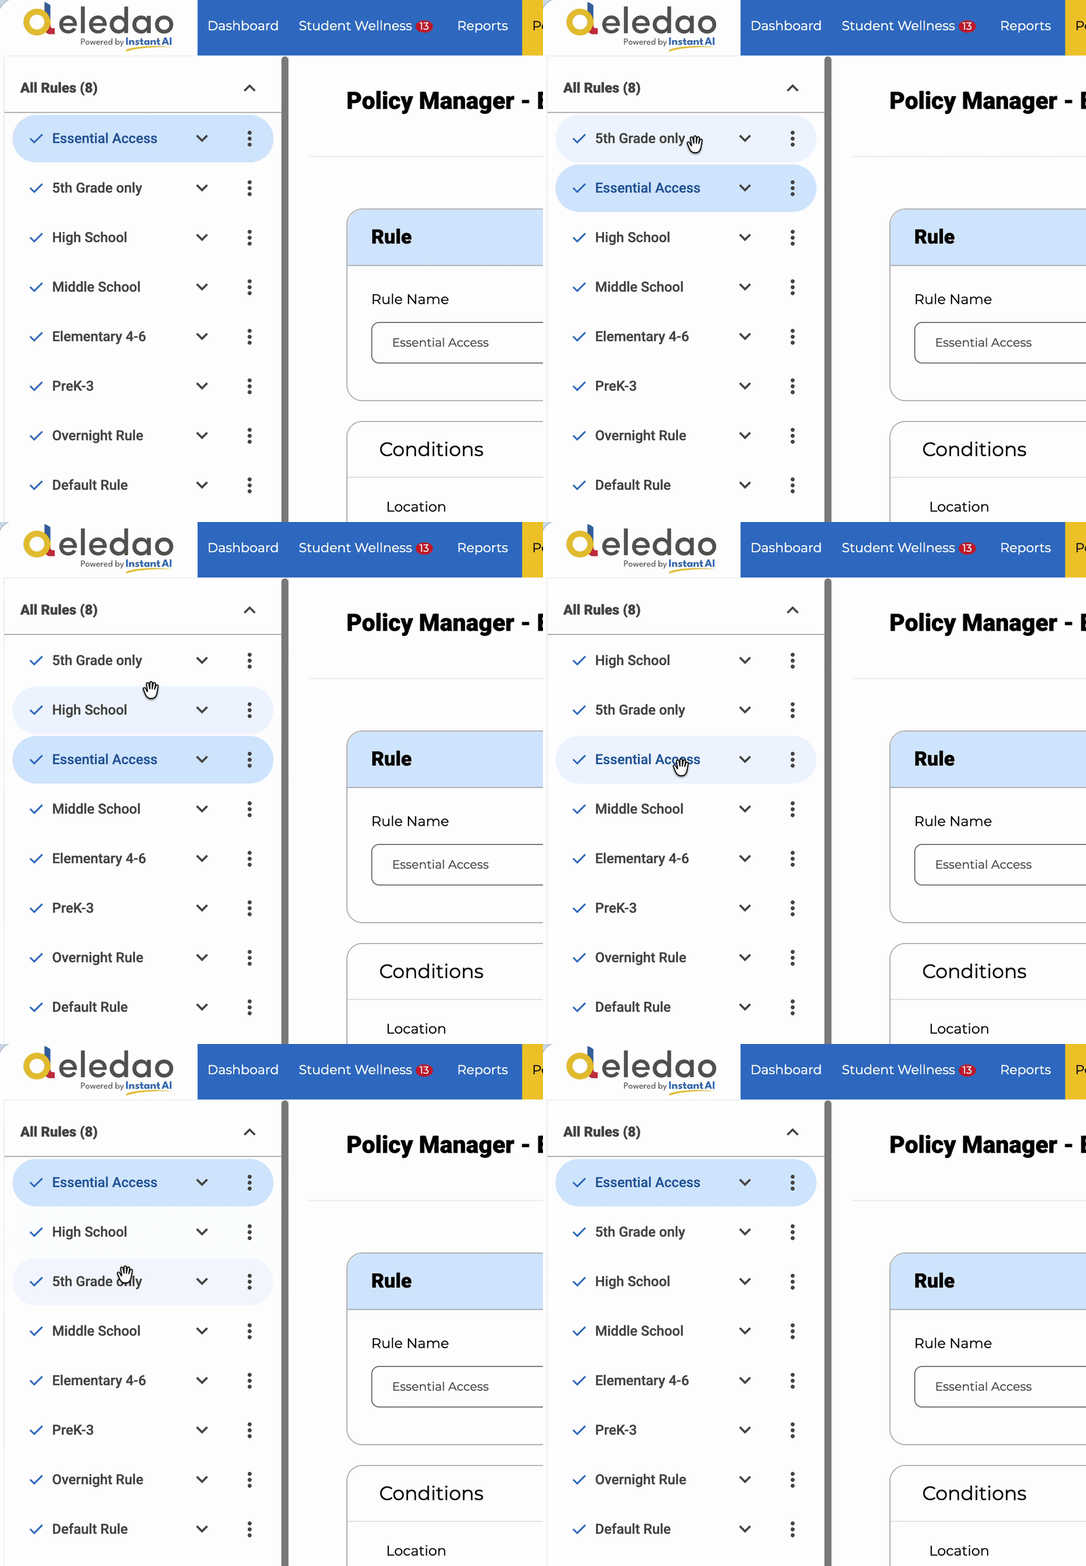
To move a rule:
- Click and hold the rule.
- Drag it to the desired location.
- Release the rule to save its new position.
Note: For longer rule names, the divider bar can be expanded to the right to make them visible.

Rules Without Conditions
If a rule has no conditions selected, that rule applies to all users.
This can cause unexpected results because the rule may be matched before other intended rules.
Example
A rule with:
- No User
- No OU
- No Group
will match everyone.
As a result, any rules below it may never be evaluated.
Working with Incomplete Rules
If you are creating a rule but are not ready to assign conditions, Deledao recommends one of the following options:
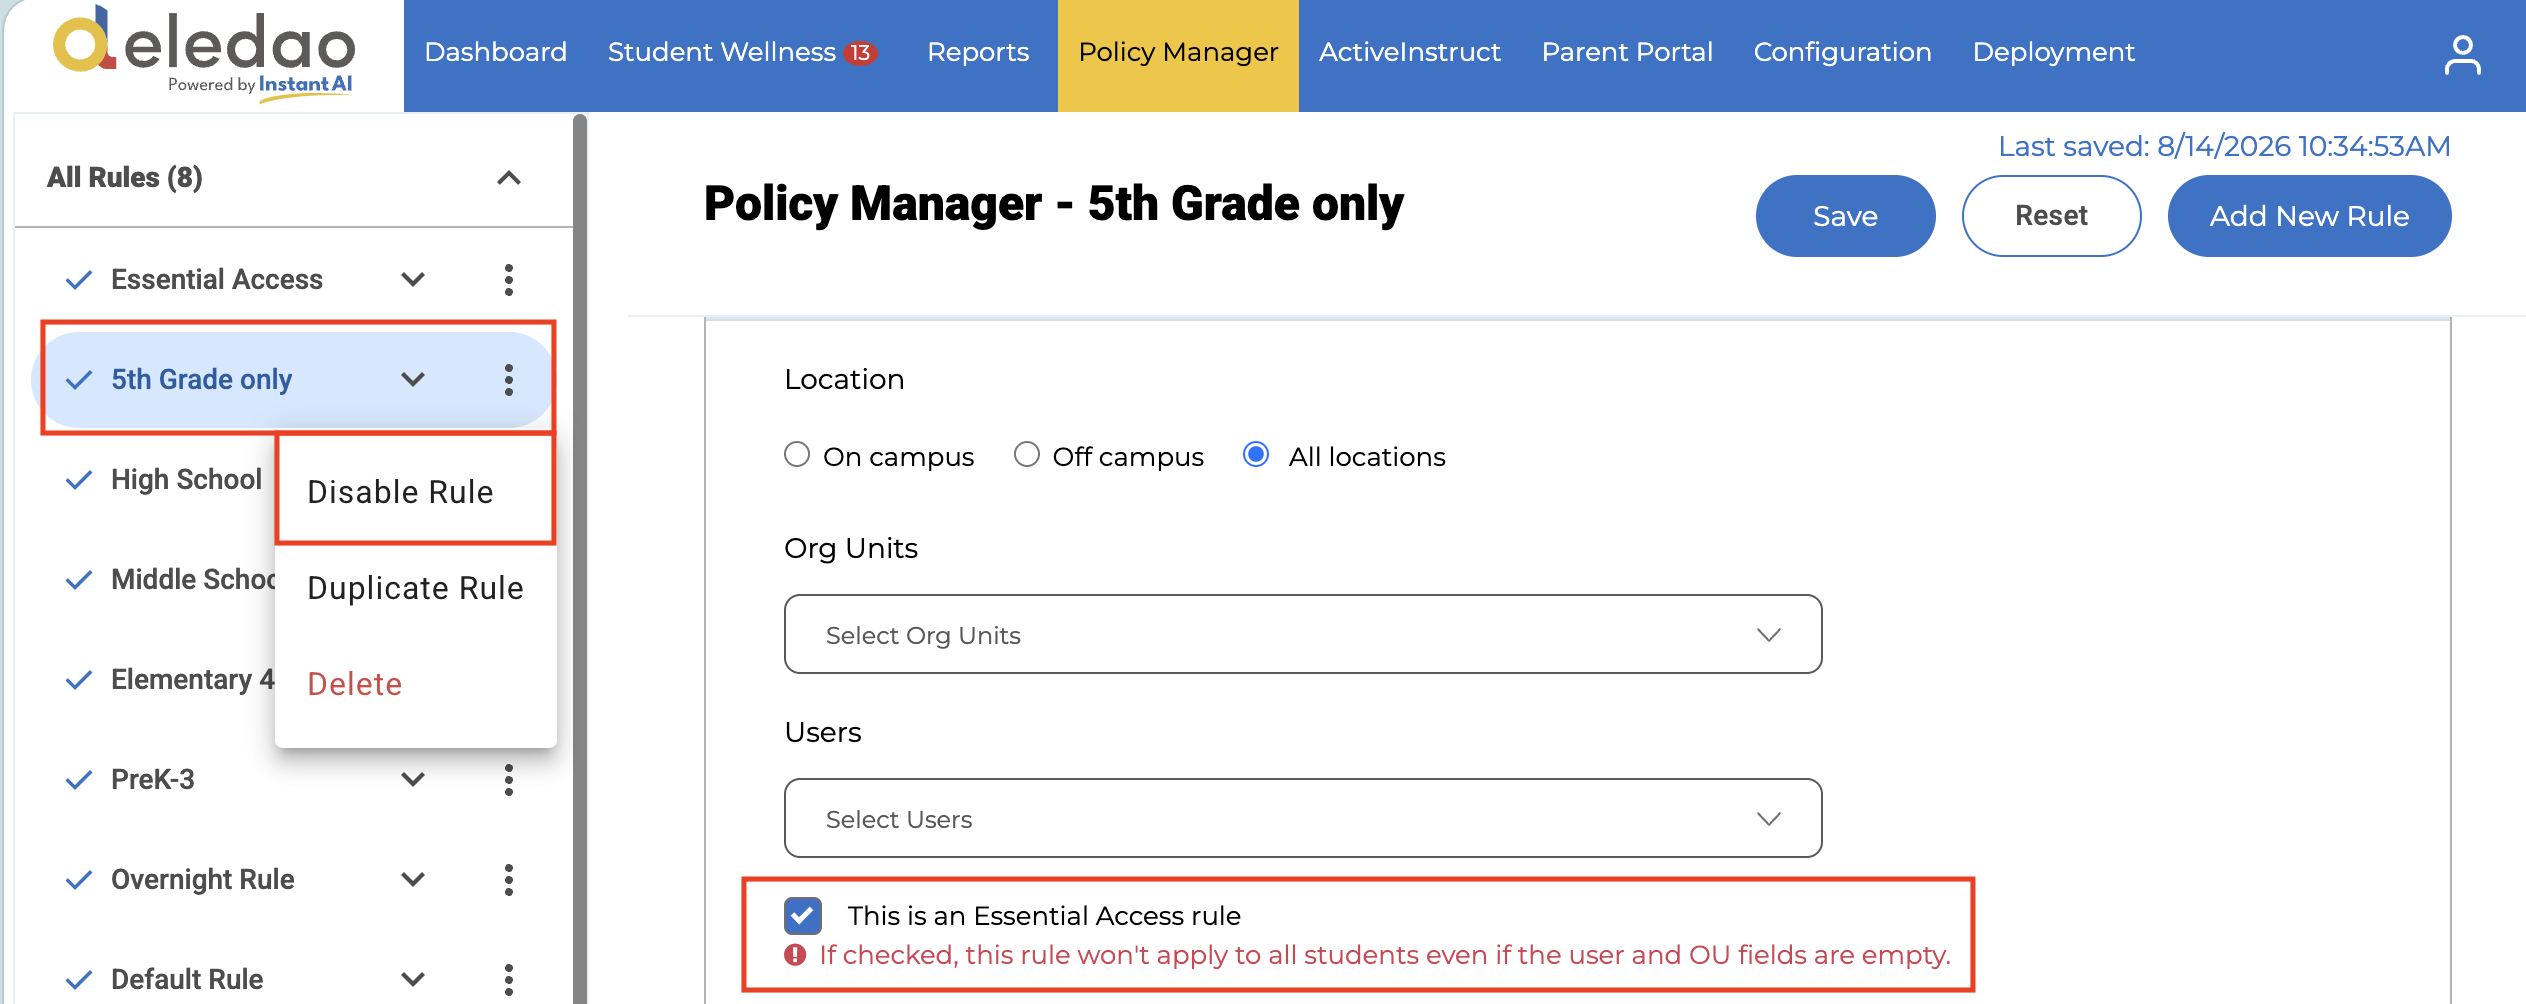
Option 1: Mark as an Essential Access Rule
If the rule is intended to provide access to critical resources, enable: This is an Essential Access Rule
Option 2: Disable the Rule
Disable the rule until configuration is complete by clicking the checkmark icon to the left of the rule name.
This prevents the rule from unintentionally applying to all users while it is being configured.
Rule Hierarchy Best Practices
- Place individual-user rules above OU-based rules.
- Place specific OU rules above broader OU rules.
- Review rule order whenever troubleshooting filtering behavior.
- Disable unfinished rules rather than leaving them active without conditions.
- Remember that the first matching rule conditions always takes precedence.
- Use the Default Rule as your safety net for users who do not match any other rule.
Understanding Rule Hierarchy is one of the most important aspects of Policy Manager because it determines which filtering settings are ultimately applied to each user.
Policy Templates
Policy Templates can be configured as a "base" list of rules that can be applied to multiple Policies. To create a Template, go to Policy Manager > Policy Templates > Add New Template.
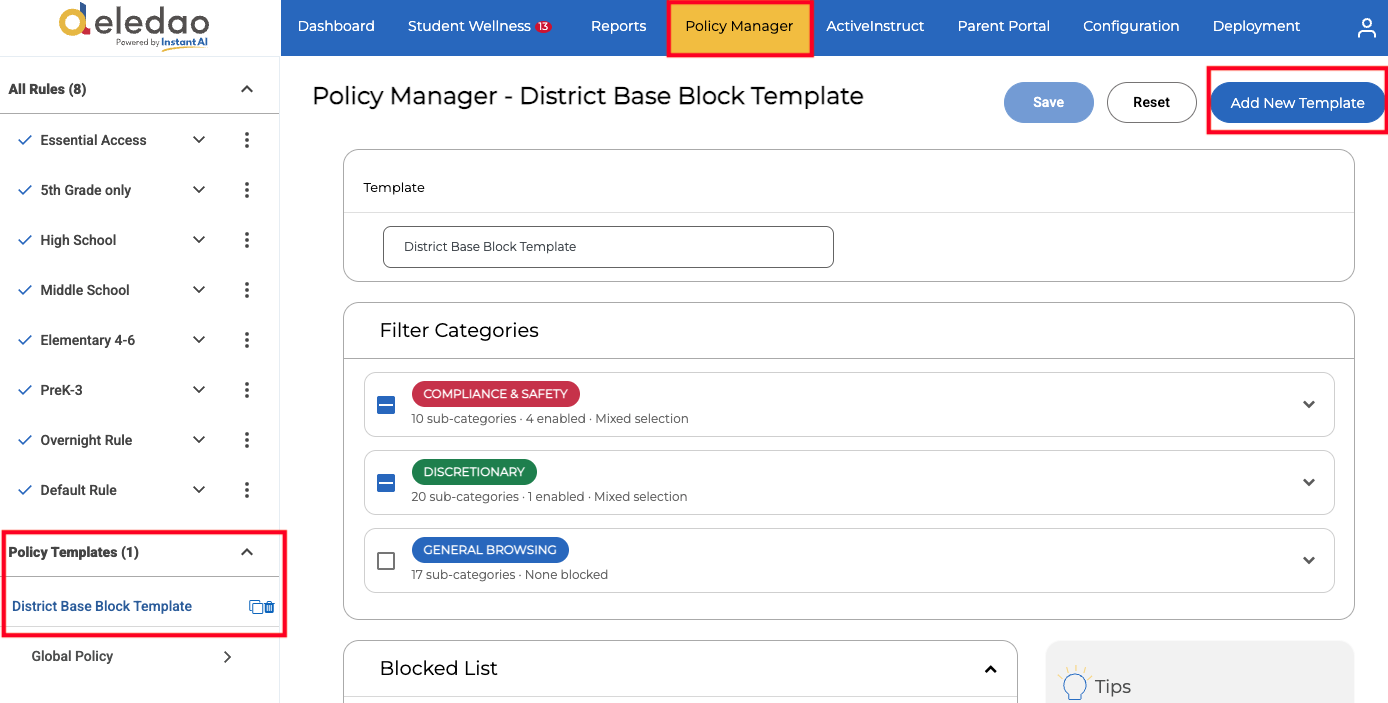
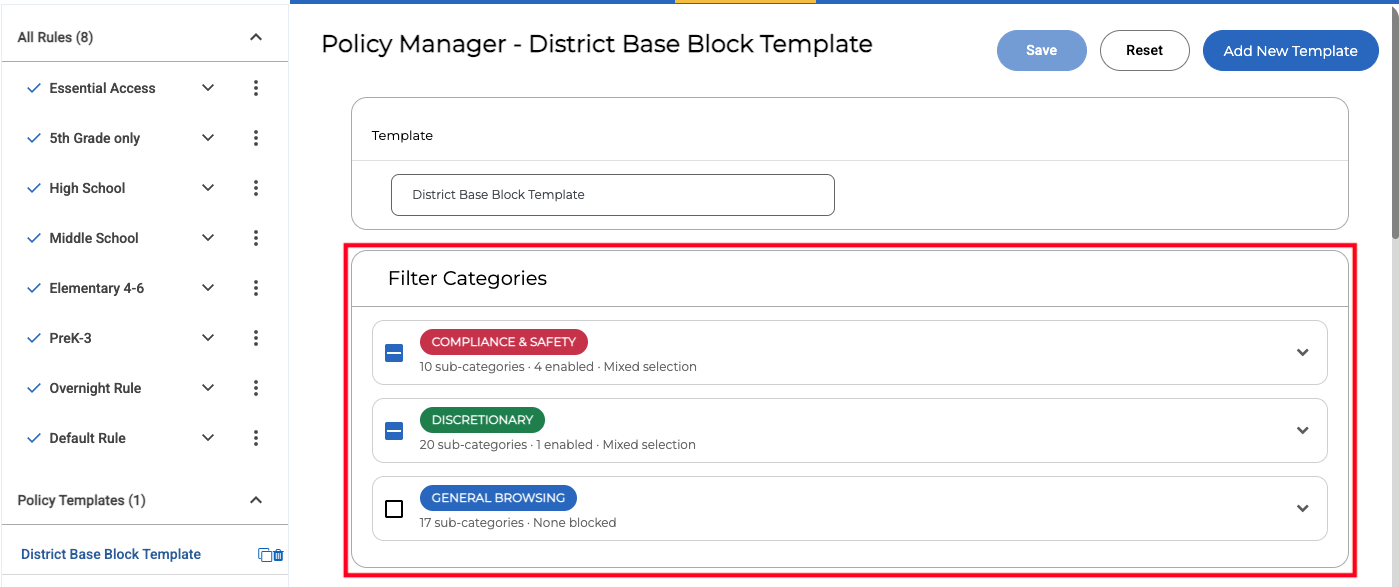
When creating a Policy Template you can configure filter Categories, URL Blocked and Allowed Lists, as well as Blocked and Allowed YouTube Categories.
Allowed list in the rule can override blocked list of Policy Templates if that option is enabled.
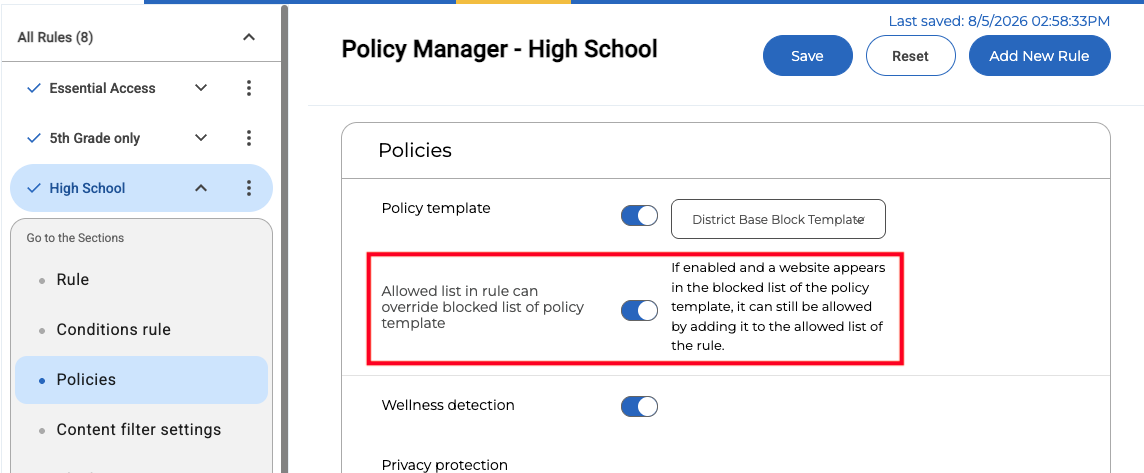
Note: If a configuration in the Policy Tempate conflicts with the same configuration in the Policy Rule, there is no priority over a Template vs. the Policy. Consider the Template an appending set of rules that becomes part of the whole rule.
© Deledao Education